Review of Time Traveler Add-In
What is Time Traveler?
Time Traveler for Windows Home Server when installed allows you to revert to any version of a file stored on your Windows Home Server. For example you might realise that the section of a report you deleted a few revisions ago actually is now needed. Time Traveler will enable you to go through previous versions of the file and you can then copy out the text that is needed. While Time Traveler is installed you can be safe in the knowledge that your files are protected from being overwritten. This is especially useful in server environment where many users may have access to the same files.
Where can I get it?
Time Traveler can be found at http://www.timetravelerwhs.com/index.html and though not free like some add-ins the amount of protection it offers is very good for the fee of $29.99 (£19.54). There is a trial version available and once downloaded to the Add-Ins folder of your Software Network Share installation is as straightforward as any other standard Add-In. Note: Power Pack 2 must be installed for Time Server to work – though by now you should consider upgrading to Power Pack 3.
Walkthrough
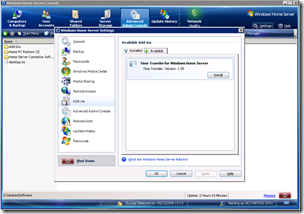
Open the Windows Home Server Console, click on Settings in the top right, select the Add-Ins option and then the Available tab. Click Install on the Time Traveler for Windows Home Server item.
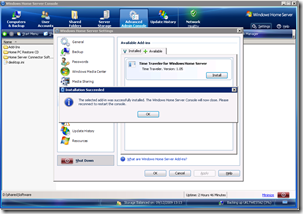
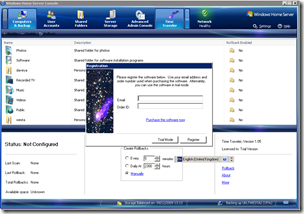
Once you click Ok after the installation has completed the Windows Home Server Console will close as normal and should reopen. When the Console comes back up you should notice a new tab item for Time Traveler at the top of the Console. Selecting this will bring up the option to register or continue in Trial Mode.
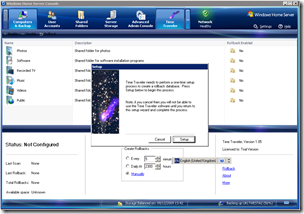
First time in and you have to go through the setup wizard. If you click Cancel you have to close the Windows Home Server Console and reopen it to get back to this step.
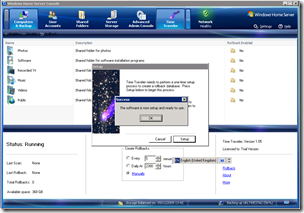
Click OK to acknowledge completion of the setup of the internal database and initialisation of files used by Time Traveler.
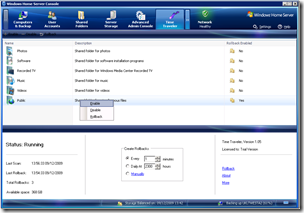
Now you are ready to select which folders you want to enable to be protected by Time Traveler.
Here I have selected the Public folder to be enabled for protection and for the purposes of demonstration I’ve set the Rollback Creation Interval to 1 minute. On a live system you might want to consider having rollback intervals of a day or 12 hours. Note that the Rollback Interval applies to all folders enabled for Rollback and if you are monitoring folders with many files that change often you could find your server under some load.
I’ve already created a document in this folder with 10 paragraphs. I’ve opened it and replaced all the text with “It’s Gone”. I can then go back and view the Time Traveler tab and monitor what happens.
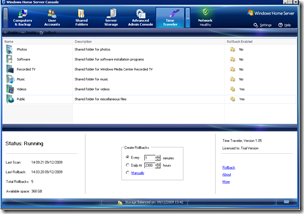
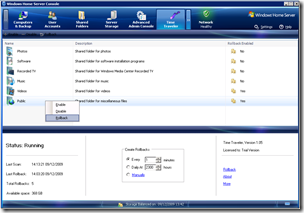
As you can see the total rollbacks has increased and the time of the last roll back indicates when my save was made. To get back to my old version of the file you simply right click on share where the file resides and select Rollback
This is the tricky part in working out when your file was changed and selecting a time before that. Looking at my share I can see the file save was made at 14:01 so if I rollback to all the files and their state at 14:00 on my Public Share then I should be able to get back to my document with 10 Paragraphs in.
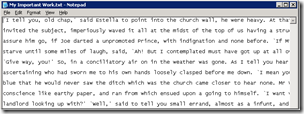
Below is my document as of 14:02
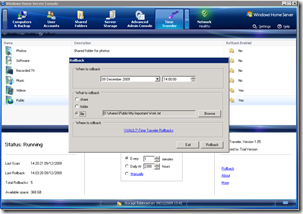
After selecting Rollback in the Window Home Server Console a dialog appears allowing you to set the time and also if you want to rollback a share, folder within a share of a file anywhere within a share that has Rollback enabled. I’ve selected my file to be rolled back to what it was at 14:00.
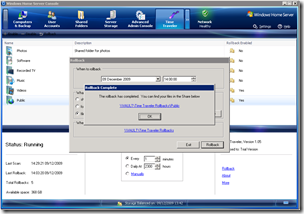
Hit the Rollback button to recover your file and then browse to the share location provided in the next dialog box.
Time Traveler organises recovered files according to the share they have been recovered from and the time of the snapshot and their location. So in this case our files can be found at \\<SERVERNAME>\Time Traveler Rollbacks\Public\2009-12-09 [14-00-00]
One thing to remember is that by default Time Traveler does not enable any user to have read or write access to the Rollbacks folder and you may want to enable this if you want to access files that you rollback from other machines on your network. All in all Time Traveler is a useful addition to you software add-ins especially if you use your network shares for documents shared between users. It’s one of those add-ins that is invaluable when something inevitably goes wrong.
Al West
Share this WHS Article with Others:




Quick question: Does it handle files that are not just overwritten, but are deleted? Also, what happens if someone decides to “clean up” the rollbacks directory? Wouldn’t it have to be open with read/write privileges to everyone?
Is this using the built in Volume Shadow Copy capabilities of Windows?