SSD System Drive on WHS 2011
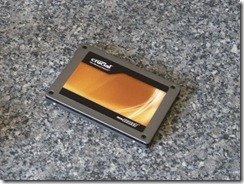
For a good year and half now my EX490 has served me well as the only server in my household. It takes care of all essentials activities such as media sharing and backup. It’s the hub of my digital archives, the brain in the distributed backup solution and with VMware it’s my own little cloud. I’ve been thinking of upgrading to Windows Home Server 2011 for a while and I wanted to run my old WHSv1 in a VM to keep some of my old backups accessible. My major concern was still being able to have a responsive server along the way. I’m lucky in that in the past I’ve found a Q8400S and 4GB for relatively low costs and recently I acquired a Crucial C300 256GB SSD and a Kingston Storage Bay Adapter (SNA-DC/35)
It was time to replace the system disk in the EX490 with an SSD and install WHS2011 on the way.
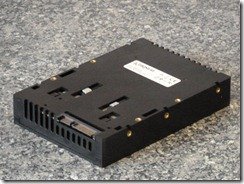
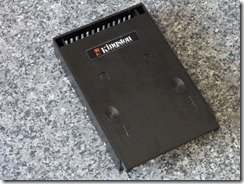
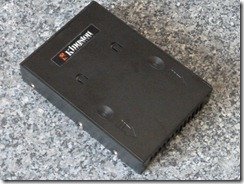
The Caddy
Kingston make great quality products and this one is no exception.
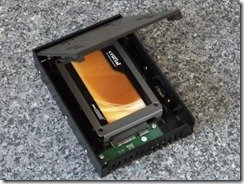
This unit is designed to house a regular 2.5” Hard Disk Drive (it doesn’t matter if it’s the traditional spinning Winchester unit or a more up to date SSD) and the C300 fits perfectly within it.
Any 2.5” SSD should fit absolutely fine, if you have a shorter than normal drive (I’m not aware of any) then you might have to make up the length with some material as the lever butts up against the short side of the drive. Though the caddy is made of plastic it’s tough and well built.
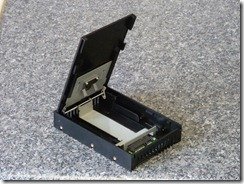
There are two finger grips on the top of the unit and these are used to slid the top of the caddy away from it’s body allow the top of the unit to hinge up.
When open you can then clearly see where the drive should be seated.
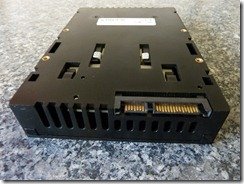
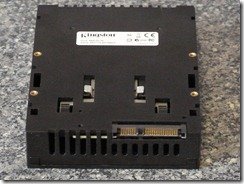
The SSD easily dropped into it’s new home and after gently closing and sliding back the caddy lid we now have SSD power in a comfortable form factor for the EX490. On inspection against a 3.5” drive the Kingston Caddy is identical in terms of fittings and shape. Of course it is a lot lighter and though not really needed for an SSD there are some vents in place to help keep any unit inside cool.
Preparing for WHS2011
As I intend to move my existing WHSv1 into a VM I thought it was an idea to migrate my data from the internal drives to an external storage unit. I also decided to export the backups at the same time using Alex Kuretz’s WHS BDBB Add-In. I also uninstalled any software or add-ins which may conflict when they are running on the prime server, WHS2011. I then used the VMware convertor software to clone the physical machine to a virtual machine. For fun I decided to only clone the system disk to see what challenges I will have rebuilding the machine later on. Fast forward to after a few days copying data and I was finally done. Once my data had been copied off I removed each drive from the pool using the console and then physically popped the drive out of my EX490.
Installing WHS2011
I won’t go into the full details here as there are plenty of articles around to detail installing Windows Home Server 2011 on the EX series using a USB Flash key. The important issue to remember is that if you have used the USB key previously to a successful install of WHS2011 is that you will have to remove the Processed line from your cfg.ini
Also it’s a essential to physically remove all of your drives from the server (including USB and eSATA drives) and only connect the SSD. If the drive is brand new then you don’t need to do anything else but if you are reusing an existing drive it would be an idea to remove all the partitions from it to ensure a successful install. With the EX series being headless servers it’s hard to tell when the unit will come up. I use DHCP reservations on my router so I was confident that I could keep pinging the servers IP address to know when it came up. All in all the install took around 20 minutes (I wish I had timed it now, but then again with a Q8400S it would not be comparable to a stock server).
SSD Performance
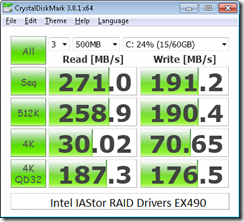
I don’t have to tell you that SSDs are fast but as I have the exact same model C300 in my desktop machine I was surprised to find that the EX490 can utilise it with a bit more gusto than my Dell 8000 with an i7-860 running the 64-bit version of Windows 7. Thinking about it a little more it must be that Windows Server 2008 R2 is optimized more heavily for server duties that the desktop variant of the kernel in Windows 7. Sequential Read Write is in the order of 280MB/s but the big one we want for the server is Random 4K access without queuing. which is an unbelievable 80MB/s. Reboot time from remote desktop back to remote desktop is a shade over 1 minute.
Here is the CrystalDiskMark benchmark of the SSD on the EX490 using the IAStor Drivers from Intel. Also the speeds quoted in the text should say the actual read write speeds. I.e. on sequential 270MB/s read, 191MB/s write, on Random 4K no queue, 30MB/s Read and 70MB/s write.
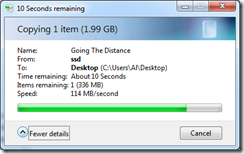
Windows File copy from the server to the PC at 114 MB/second
Home Server inside of Home Server
Initially I have only run up WHSv1 under WHS2011 utilizing VMware. There are a few tweaks you have to do to the Virtual Machine Configuration file do get the hard drive recognized as a SCSI disc but I will detail all of that in a later article.
Share this WHS Article with Others:


“As I intend to move my existing WHSv1 into a VM I thought it was an idea to migrate my data from the internal drives to an external storage unit. I also decided to export the backups at the same time using Alex Kuretz’s WHS BDBB Add-In. I also uninstalled any software or add-ins which may conflict when they are running on the prime server, WHS2011. I then used the VMware convertor software to clone the physical machine to a virtual machine. ”
Wow, there’s a lot going on in this paragraph. Could you please explain these steps in more detail? I am also planning an upgrade from WHS v1 to v2, and didn’t want to lose all my backups. Specific questions would be: 1) exactly how did you use VMWare converter? 2) how does the BDBB addin help you? You can export the backups with it, but what do you do with them after you export it?
Thanks!
FYI – WHS 2011 requires at least 160 Gb. I was able to clone the (first 2) partitions of the hard drive I installed WHS 2011 on to a 120Gb SSD. It worked but was a little squirrely. Obviously I couldn’t reinstall bec. the install program rejects installation on a drive < 160 Gb, even though the initial install space took something like 100 Mb for the boot partition (whatever it is; the 1st partition on the drive) and 60 Gb (initially) for the WHS 2011 partition.
Installing SBS 2011 Essentials on SSD or SATA Hard Drives smaller than 160GB
Followup – here’s an article on another WHS site that discusses installing SBS 2011 on a SSD < 160 Gb:
http://usingwindowshomeserver.com/2011/09/21/installing-sbs-2011-essentials-on-ssd-or-sata-hard-drives-smaller-than-160gb/