HP EX48X server software v.2 to v.3 upgrade
HP are offering current EX48X owners the possibility to upgrade their HP MediaSmart Server software from v.2 to v.3 which is basically the EX49X specification, with the introduction of a chargeable upgrade. As yet the pricing hasn’t been announced but we are hopeful that this will be kept to an absolute minimum.
With this upgrade you get 3 replacement discs – the server restore disc, the software installation disc and the PC restore disc. The important one is the server restore disc as this contains all the upgraded WHS software, but the other two are important to maintain the integrity of the installation and restore process.
So What’s New?
Generation 2 Video Converter
- Create profiles to match your viewing device
- Control how your video is converted Enhanced Media Collector
- Faster collections
- Select specific media, locations, computers to collect from
- Improved status feedback
More Mac
- Mac Media Collection
- Server Administration via Mac
- Faster Mac image level backup and recovery Improved user interface
- New look & feel
- Improved user flows
- Feature overview pages in the Windows Home Server Console
- Web based home page – access your media from home (local network) or away (via web) using a single easy to navigate web based user interface.
- New more intuitive console – set up, configure, check status from the new server administrator console page
Features That Will Change
- The client-side Media Collector Status tool is replaced by enhanced Media Collector reporting in the Windows Home Server Console.
- The HP MediaSmart Server Control Center is replaced by the web-based HP MediaSmart Server Home Page.
- Server Online Backup is no longer included as part of the HP MediaSmart Sever software. Instead, it is a free download that can be installed as an add-in. The new add-in will continue to work with your existing Amazon S3 account.
- TwonkyMedia Server for HP MediaSmart is no longer an add-in. It has been integrated into the HP MediaSmart Server software.
The Server Upgrade Process
Backup, backup, backup!
(This text taken directly from HPs reviewer documentation, as it states it as well as I possibly can!)
Backup your server—HP recommends that you back up your server to an external USB device or internal SATA drive. To add a backup drive, attach the drive to the server and select the Server Storage tab in the Windows Home Server Console. Click Add and select Use this hard drive to back up files that are on your server in the wizard. On the Computers & Backup tab, click Backup Now and select shared folders to back up. Remove the backup drive from the server prior to doing the upgrade.
User accounts and shared folder access—User accounts will be deleted during the upgrade. However, user’s shared folders and their contents will remain on the server. You will need to recreate user accounts and define shared folder access after completing the upgrade. To ensure that you have the information that you need to recreate accounts go to the User Accounts tab of the Windows Home Server Console and write down user accounts, passwords, and shared folder access.
Remote access and domain name settings—Remote access will be disabled during the upgrade. The server should remember your domain name when you re-enable remote access and complete the set up wizard. Write down your domain name prior to doing the upgrade in case you need to manually re-enter it later. In the Windows Home Serer Console, click Settings and select Remote Access in the left menu. Write down your Domain Name.
Media Collector—Photos, music, and videos collected by the HP MediaSmart Server 2.5 software will remain in the shared folders. However, the Media Collector settings will be disabled and the database that tracks which media files have been collected will be overwritten. In the Windows Home Server Console, click Settings and Media Collector. View the General, Photos, Music, and Videos settings and make a note of these so you can set up Media Collector v.3 with the same settings.
Video Converter—Converted video files will remain on your server during the upgrade. However, the Video Converter is significantly different in v.3 and your existing settings will be lost. You may find it helpful to record your existing settings and refer to them when you re-configure Video Converter later. To see existing settings in the Windows Home Server Console, click Settings and HP Video Converter. Note which folders are selected for video conversion and whether they are set for full or mobile resolutions.
Server Online Backup—If you are using the Server Online Backup, open the Windows Home Server Console and click Settings. Select Server Online Backup in the left menu and write down the Access Key and Secret Key. This information is also available from the Amazon S3 web site. Do not cancel your Amazon S3 account. If you cancel your Amazon S3 account, you will lose your online backup data. Use your existing Amazon S3 Access Key and Secret Key when you re-enter the settings for the Server Online Backup add-in.
Other Changes that Happen During the Upgrade
Server name and password—Your server name and password will be reset. You can use the same ones as before or create new ones.
Windows Home Server Console settings—All system settings are lost. You will need to recreate them. Write down any custom Windows Home Server Console settings that have not already been covered above. For example, if you customized your computer backups to back up specific folders instead of the entire computer, you may want to write down the names of the backed up folders so you can re-configure them.
Let the upgrade begin!
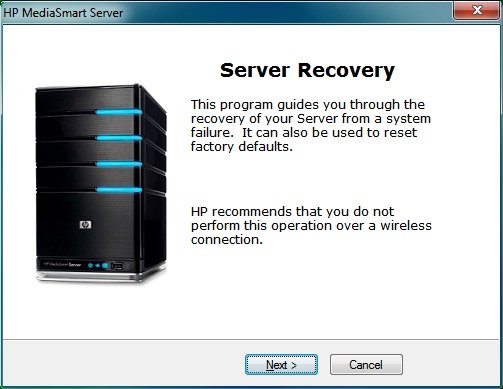
The entire process is very easy, simply put the server restore DVD into the drive of a client PC and follow the instructions on the screens shown below.
The initial splash screen:-
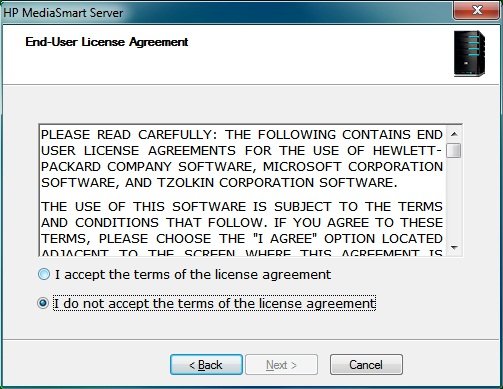
The standard EULA agreement
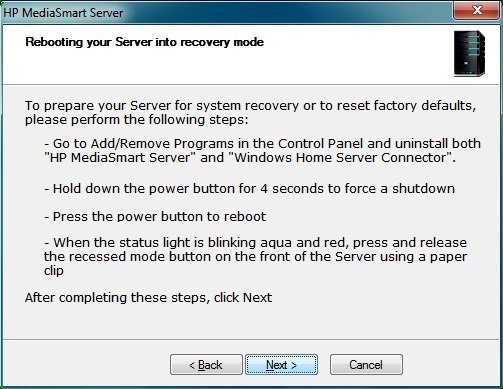
Initial instructions on the recovery process.
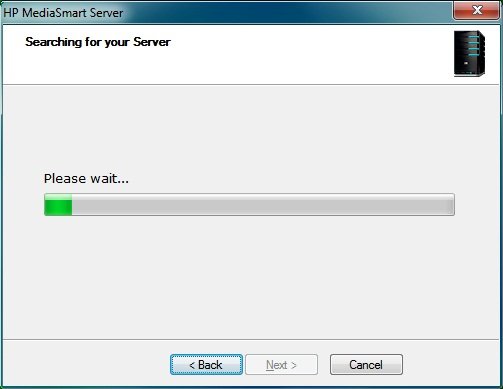
Having followed the instructions on the previous screen, the screen below indicates that the restore process has gone off on the network to try and find your server machine. This process can take some time, upwards of five minutes in some cases.
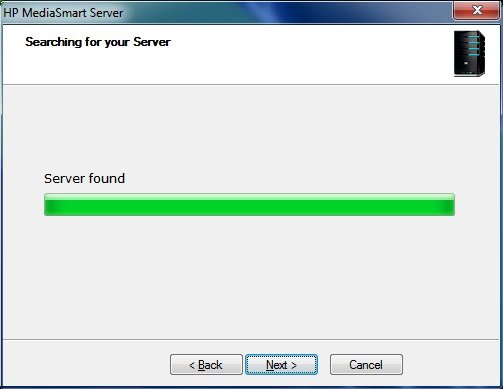
Eventually the server is found on the network and the process can continue.
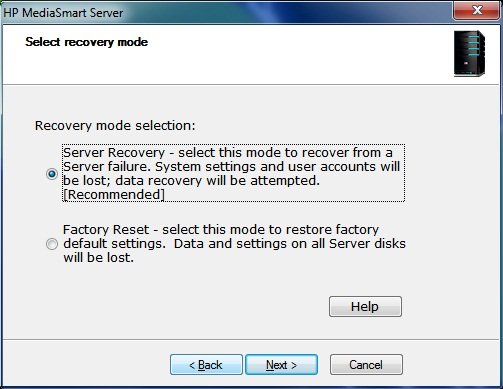
On the next screen you need to select the recovery mode, and in reality I don’t think that the choice made here makes any impact on the result; but I selected server recovery as this seemed the most appropriate choice.
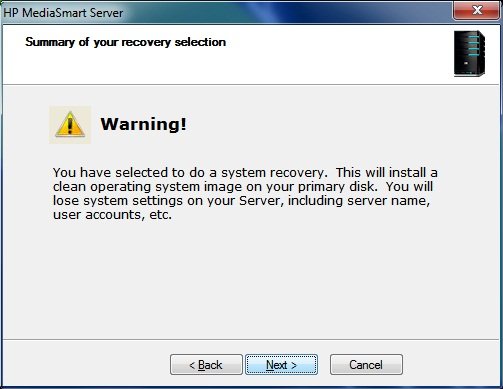
You have one final decision to rethink your decision, but you have come this far so why not continue!
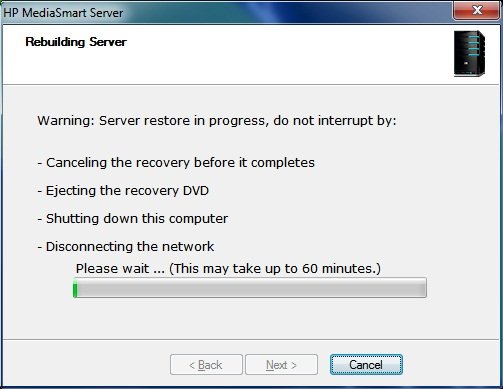
The rebuild process starts and this whole process can take up to an hour as it is effectively a Windows Home Server operating system re-install and rebuild.
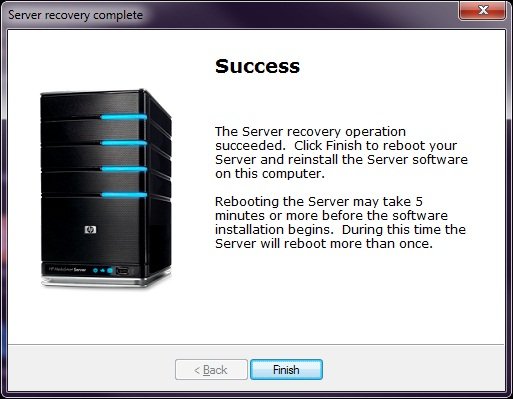
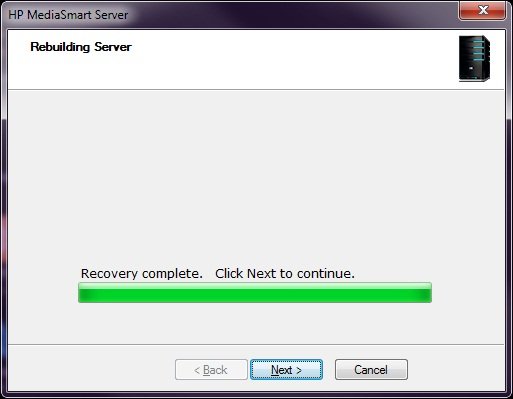
Once complete you are presented with the recovery complete screen.
And a success screen – hurrah!
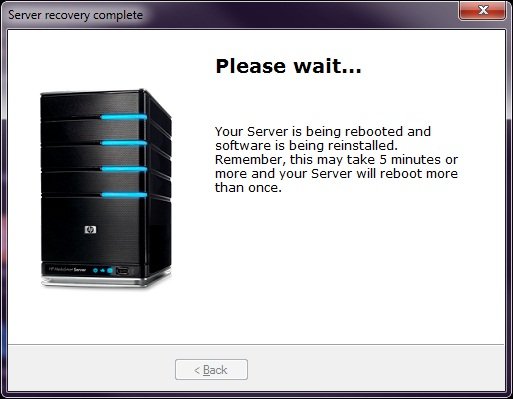
The final rebuild process necessitates some reboots of the server.
Finally in your network neighbourhood, (this shot is on a Windows 7 machine), the Server will show up as HPSTORAGE, before you set it up with your own server name.
Reconfiguration
You will now need to go through the entire setup process as previously defined for the EX48X as defined in my initial review here.
Once that process has been completed all the features that you want to make use of will need to be re-configured before you can use them with the HP MediaSmart Server v.3 software.
The functionality will now be the same as defined in Steve Crick’s excellent review of the EX495 which you can find here.
Summary
All in all, the actual upgrade process is very easy to do, but you must consider all the other peripheral work you have to do.
This includes backing up all your data elsewhere first, which may be difficult to do unless you have an appropriate amount of external storage. Also unless you use an addin like WHSBB, (see our writeup at https://www.mswhs.com/2009/04/23/add-in-windows-home-server-backup-database-backup-bdbb-1016/), you will lose all your client backups.
You then have to set up the WHS settings back to where you had them and then reset all the features. These two tasks alone could take some time.
This is definitely not a task for the feint hearted! Is it a task worth doing? This really depends on what extra features you are looking to upgrade – the generation 2 video converter may be worth it on its own, but the media collector tool whilst once being the killer application, is now a standard feature since the introduction of Power Pack 3.
Would I do the upgrade? As an IT person I always tend to upgrade whenever I can, and despite the obvious pain involved in this process I think it just could be worth it!
Share this WHS Article with Others:



That’s a lot of new upgrades. It seems only to be getting better and better. Can’t wait to try it out. Thanks for posting this information up.
The iPhone is a new prospect to mobile technology which has made the mobile over a communication tool. The iPhone functions as an iPod, media player, net, camera phone, has a multi-touch screen
Have you found after the upgrade the HP Video Converter converted MP4 files cannot be played in Media Center or other Windows-media based players (Zune, etc.)? I’ve tried various changes to the config, but no luck.